

You signed the quote, the windows came in, and now there’s a crew in your driveway. Good news: install day is mostly watchable, and the parts that matter most are the ones you can actually see.
I’m going to walk you through the whole thing the way I’d walk a homeowner through it — what happens before the day, what happens hour by hour, and what a good install looks like versus a rushed one. Because here’s the quiet truth of this business: the install decides whether you feel your new windows, more than the brand on the sticker does.
By the end of this you’ll know which steps to keep an eye on, and which shortcut is the one that turns into a leak two winters from now.
What happens on window install day? The crew removes the old sash and frame, inspects the opening, sets the new unit on a sill pan with flashing lapped bottom-sides-head, shims it square and level, insulates the gap with low-expansion foam, seals the perimeter, and finishes the trim. A good crew treats the water-management steps as the whole job. A rushed one caulks over them. The order below is what to watch for.
Before the day: measure, order, and the wait
The install actually starts weeks earlier, at the tape measure. This is the part I do myself on a job, and it’s where a good outcome is quietly won or lost.
A careful measure takes each opening in three places — width at top, middle, and bottom; height at left, center, and right — and uses the smallest number each way, so the new unit clears every high spot.
The installer also checks the opening for square by measuring both diagonals; if they land within about a quarter inch of each other, the opening is square enough for a standard replacement.
Then comes a detail that surprises people: the new window is ordered a touch smaller than the opening on purpose — commonly around a quarter to a half inch of gap all the way around. That gap isn’t a mistake. It’s the room the crew needs to shim the window square and insulate around it. It gets filled on install day.
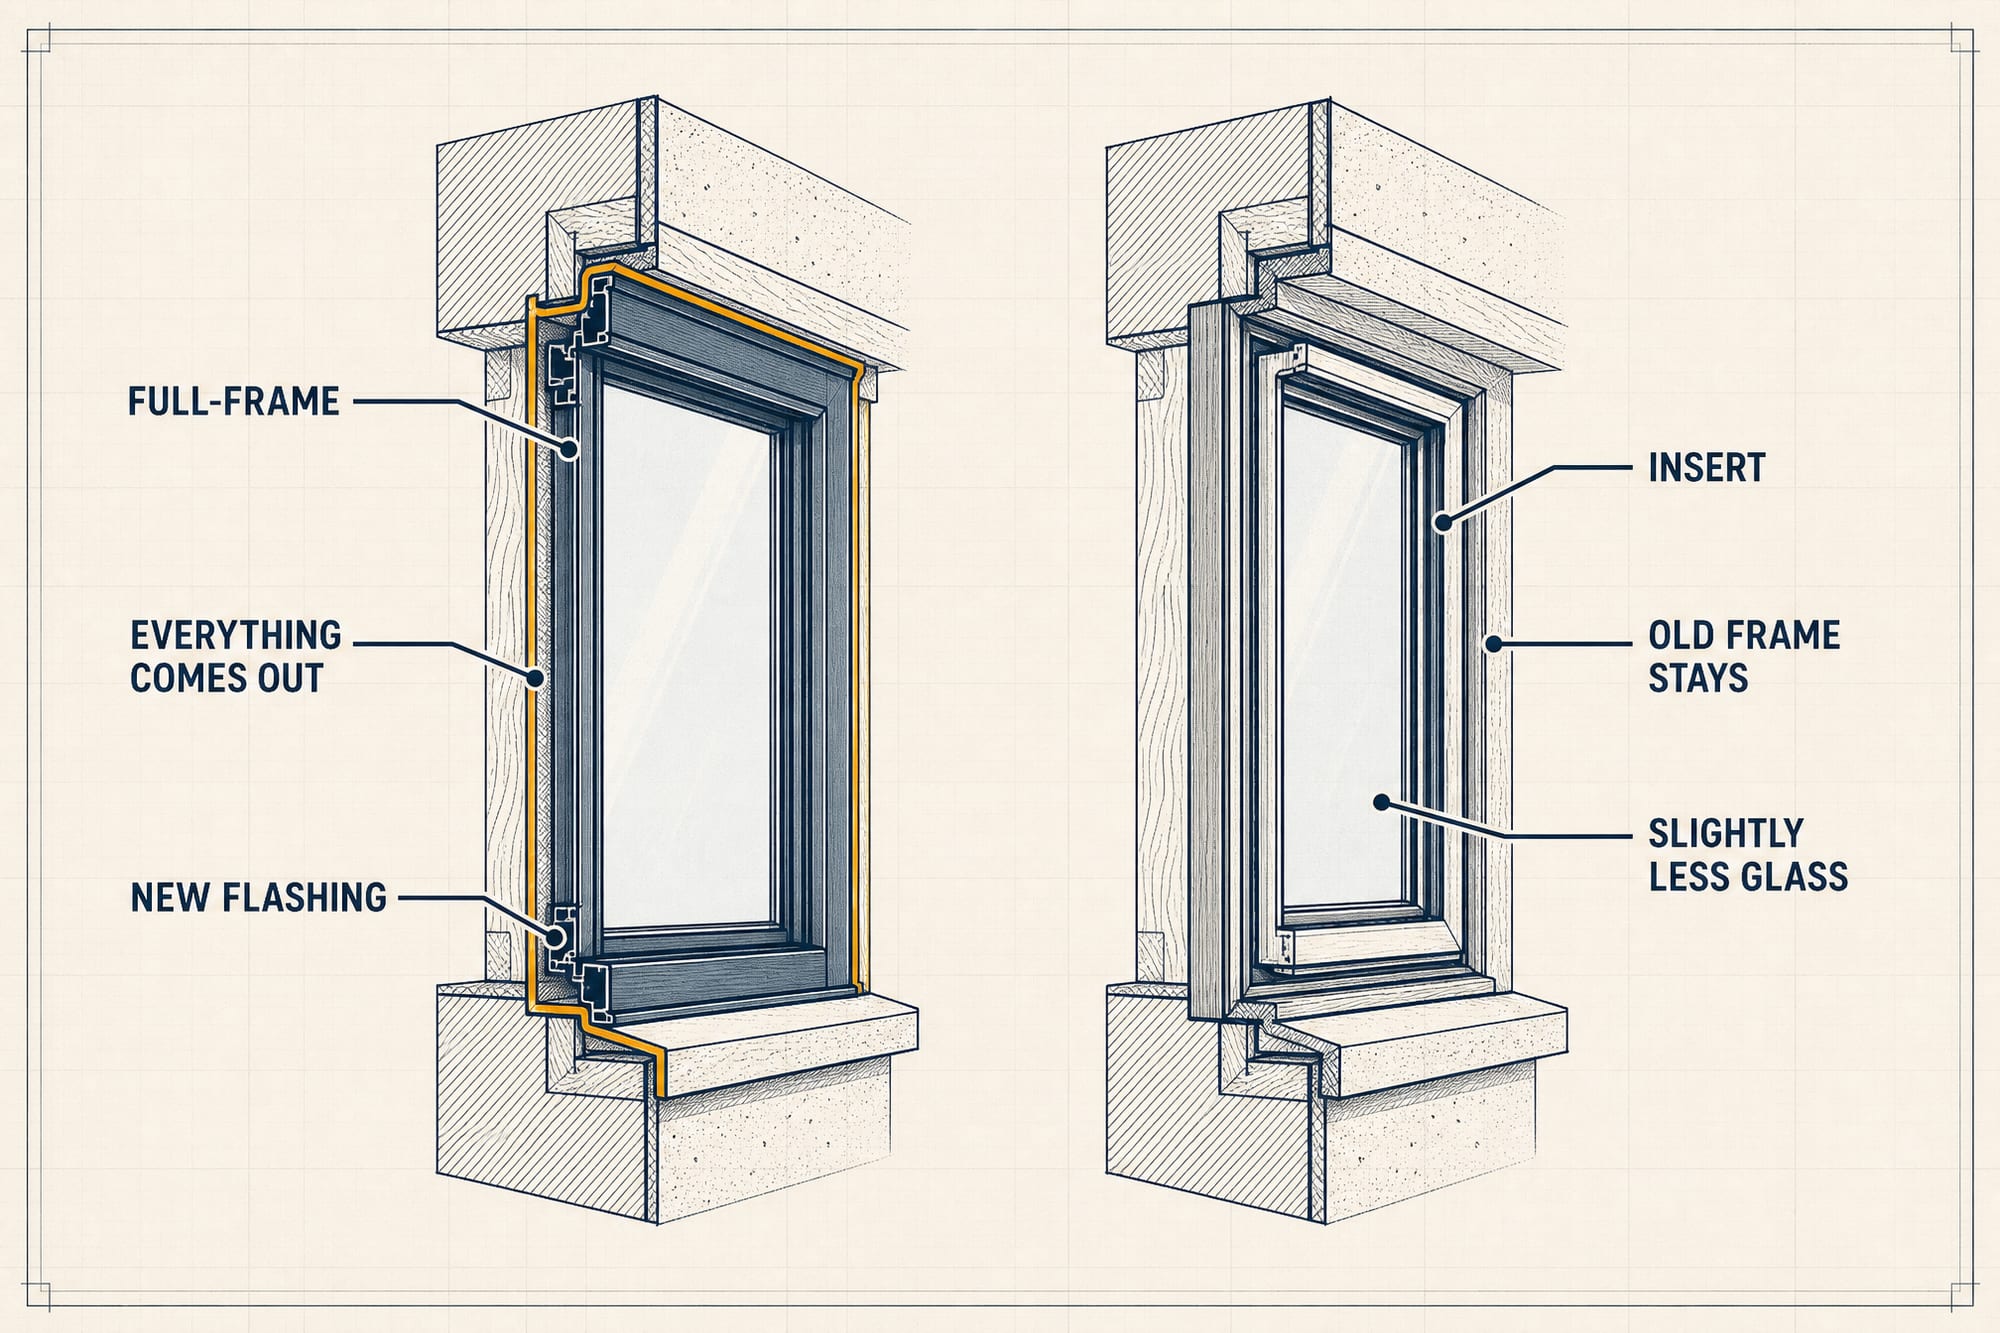
While you wait for the units to come in, the crew should confirm one more thing: insert or full-frame. That single choice is decided by your frame’s condition, and it changes the whole scope of the day — here’s the honest way to make that call.
The day, step by step (and what each one is for)
A good install runs in a specific order, and the order is the whole point — every step protects the one after it. Here’s what a proper day looks like, and why each piece is there.
- Remove the old window. On an insert, the crew pulls the old sash, stops, and hardware and leaves your frame and trim in place. On a full-frame, everything comes out down to the bare framing — the rough opening.
- Inspect the opening. This is the moment the crew looks for rot and water damage in the sill and framing. If they find soft wood, that gets fixed now — burying it under a new window is exactly how a small problem becomes a wall problem.
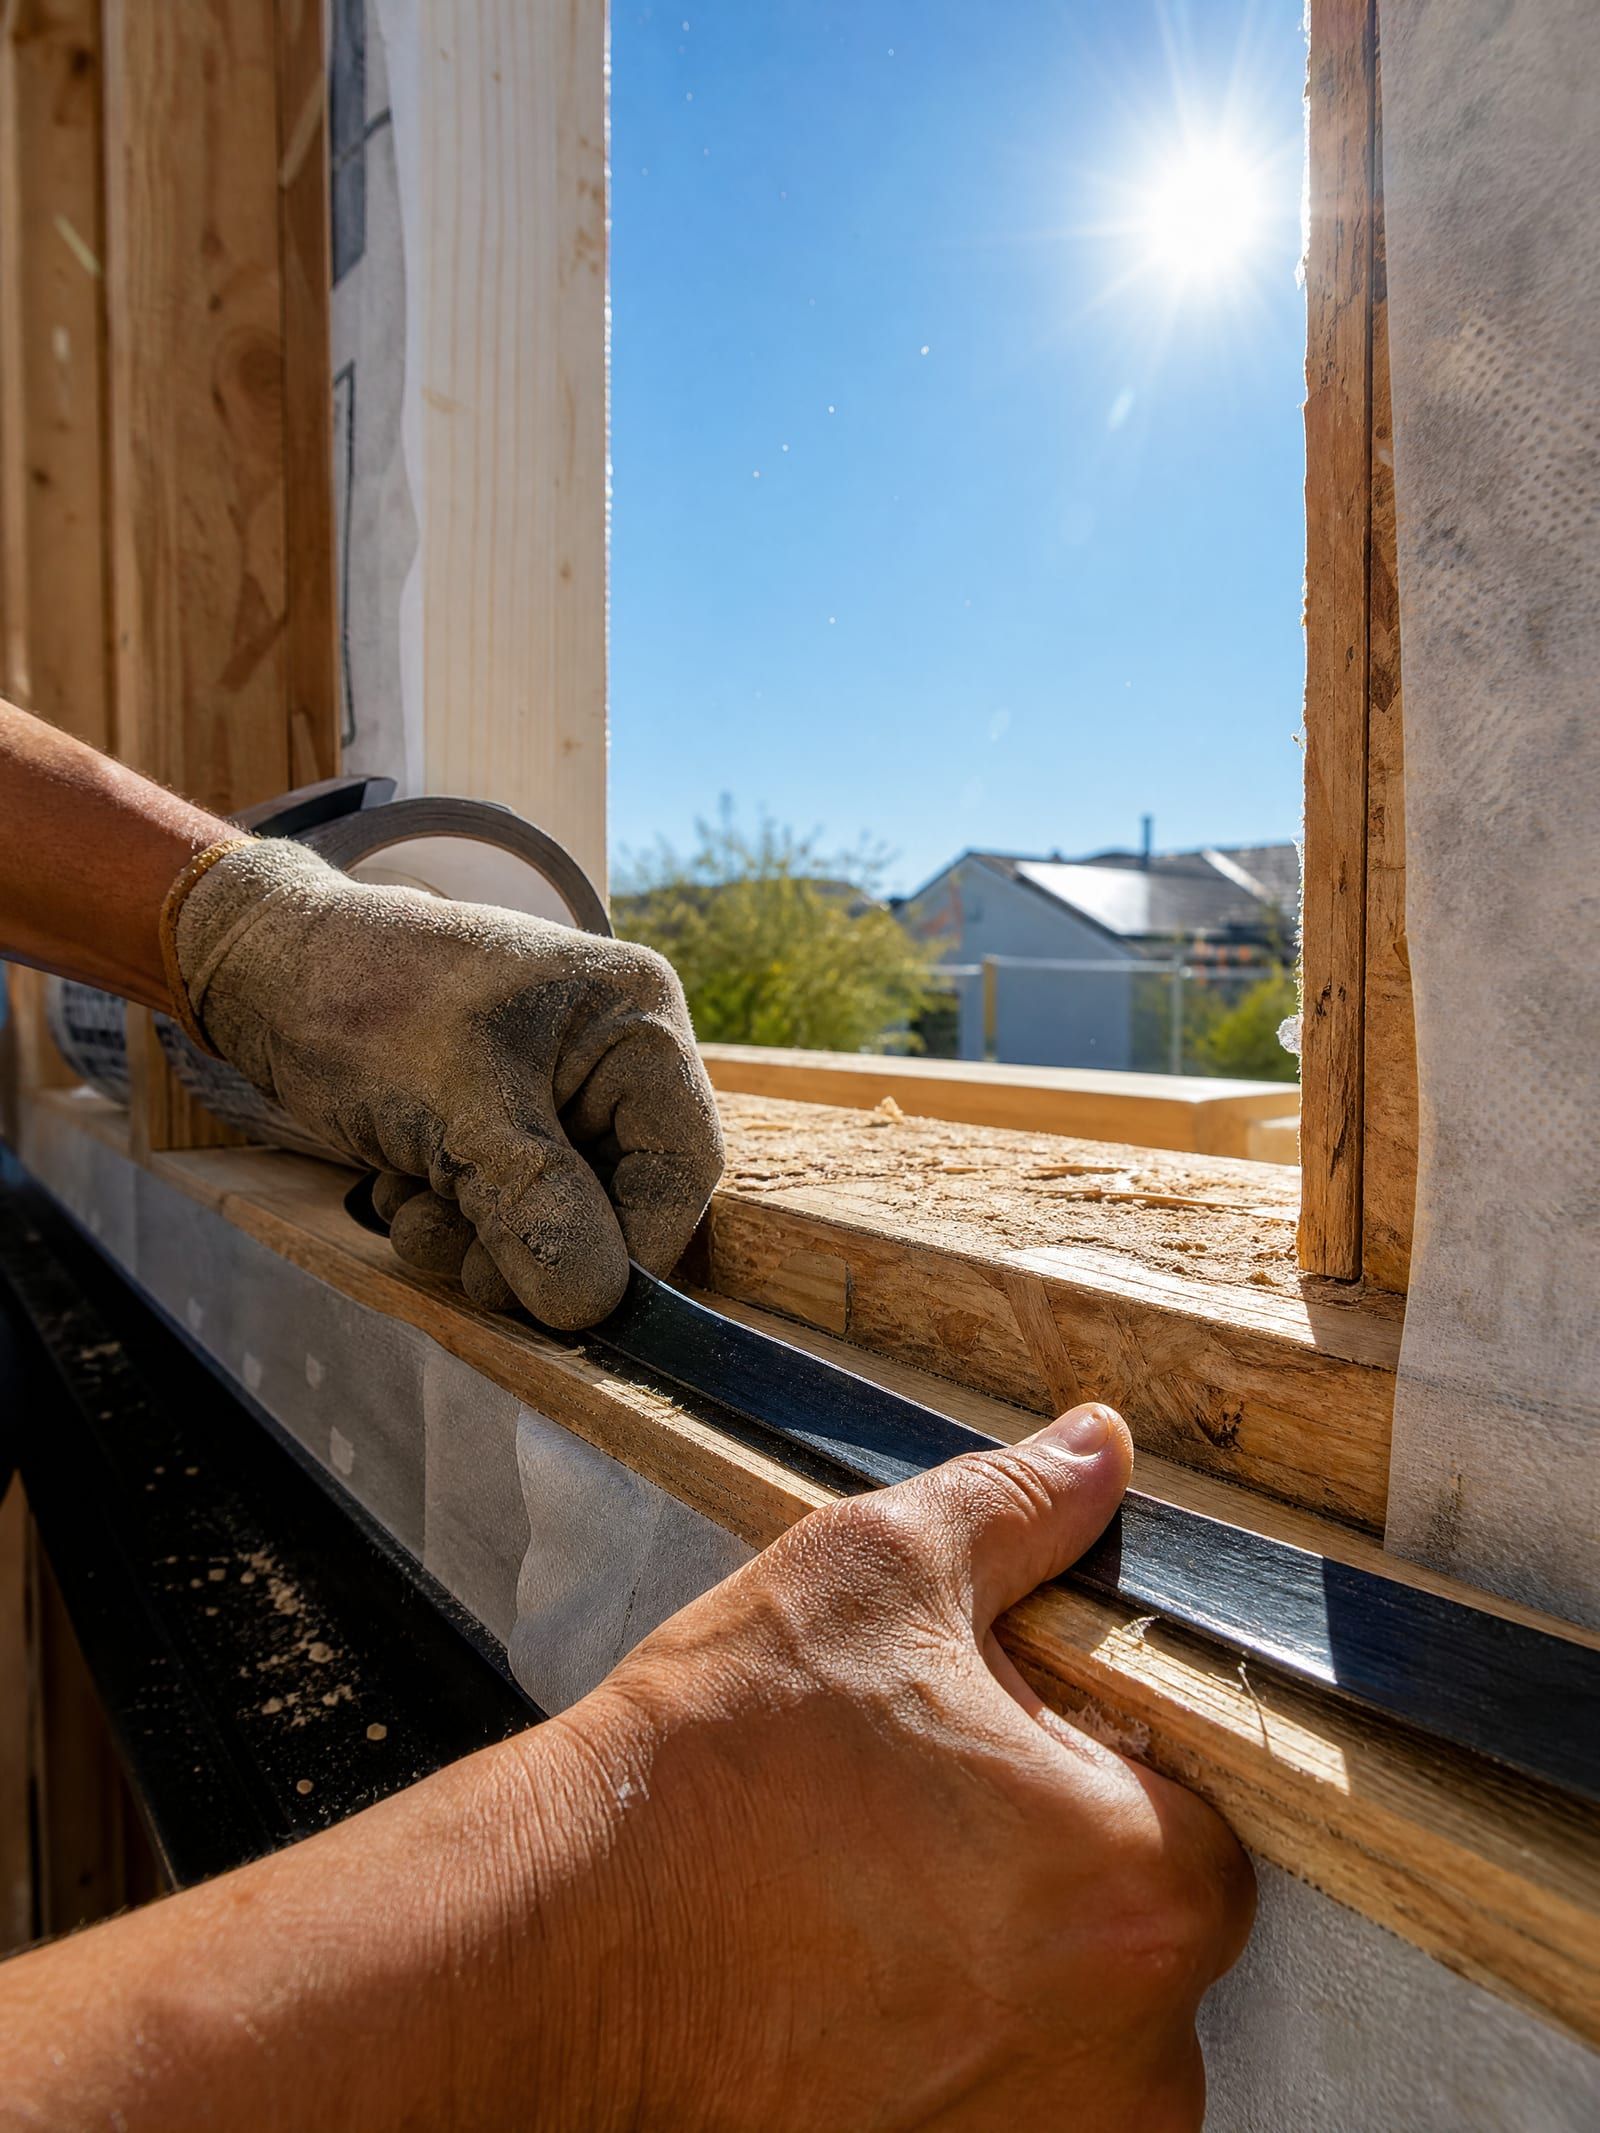
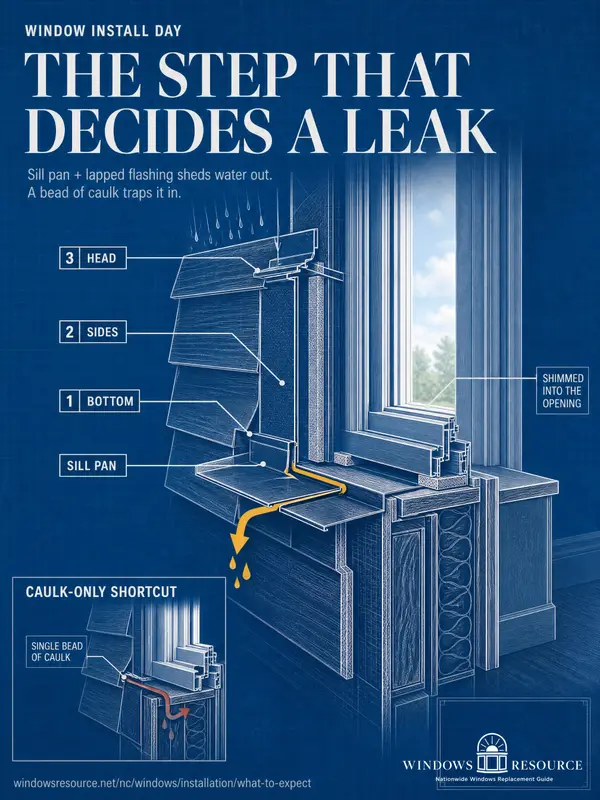
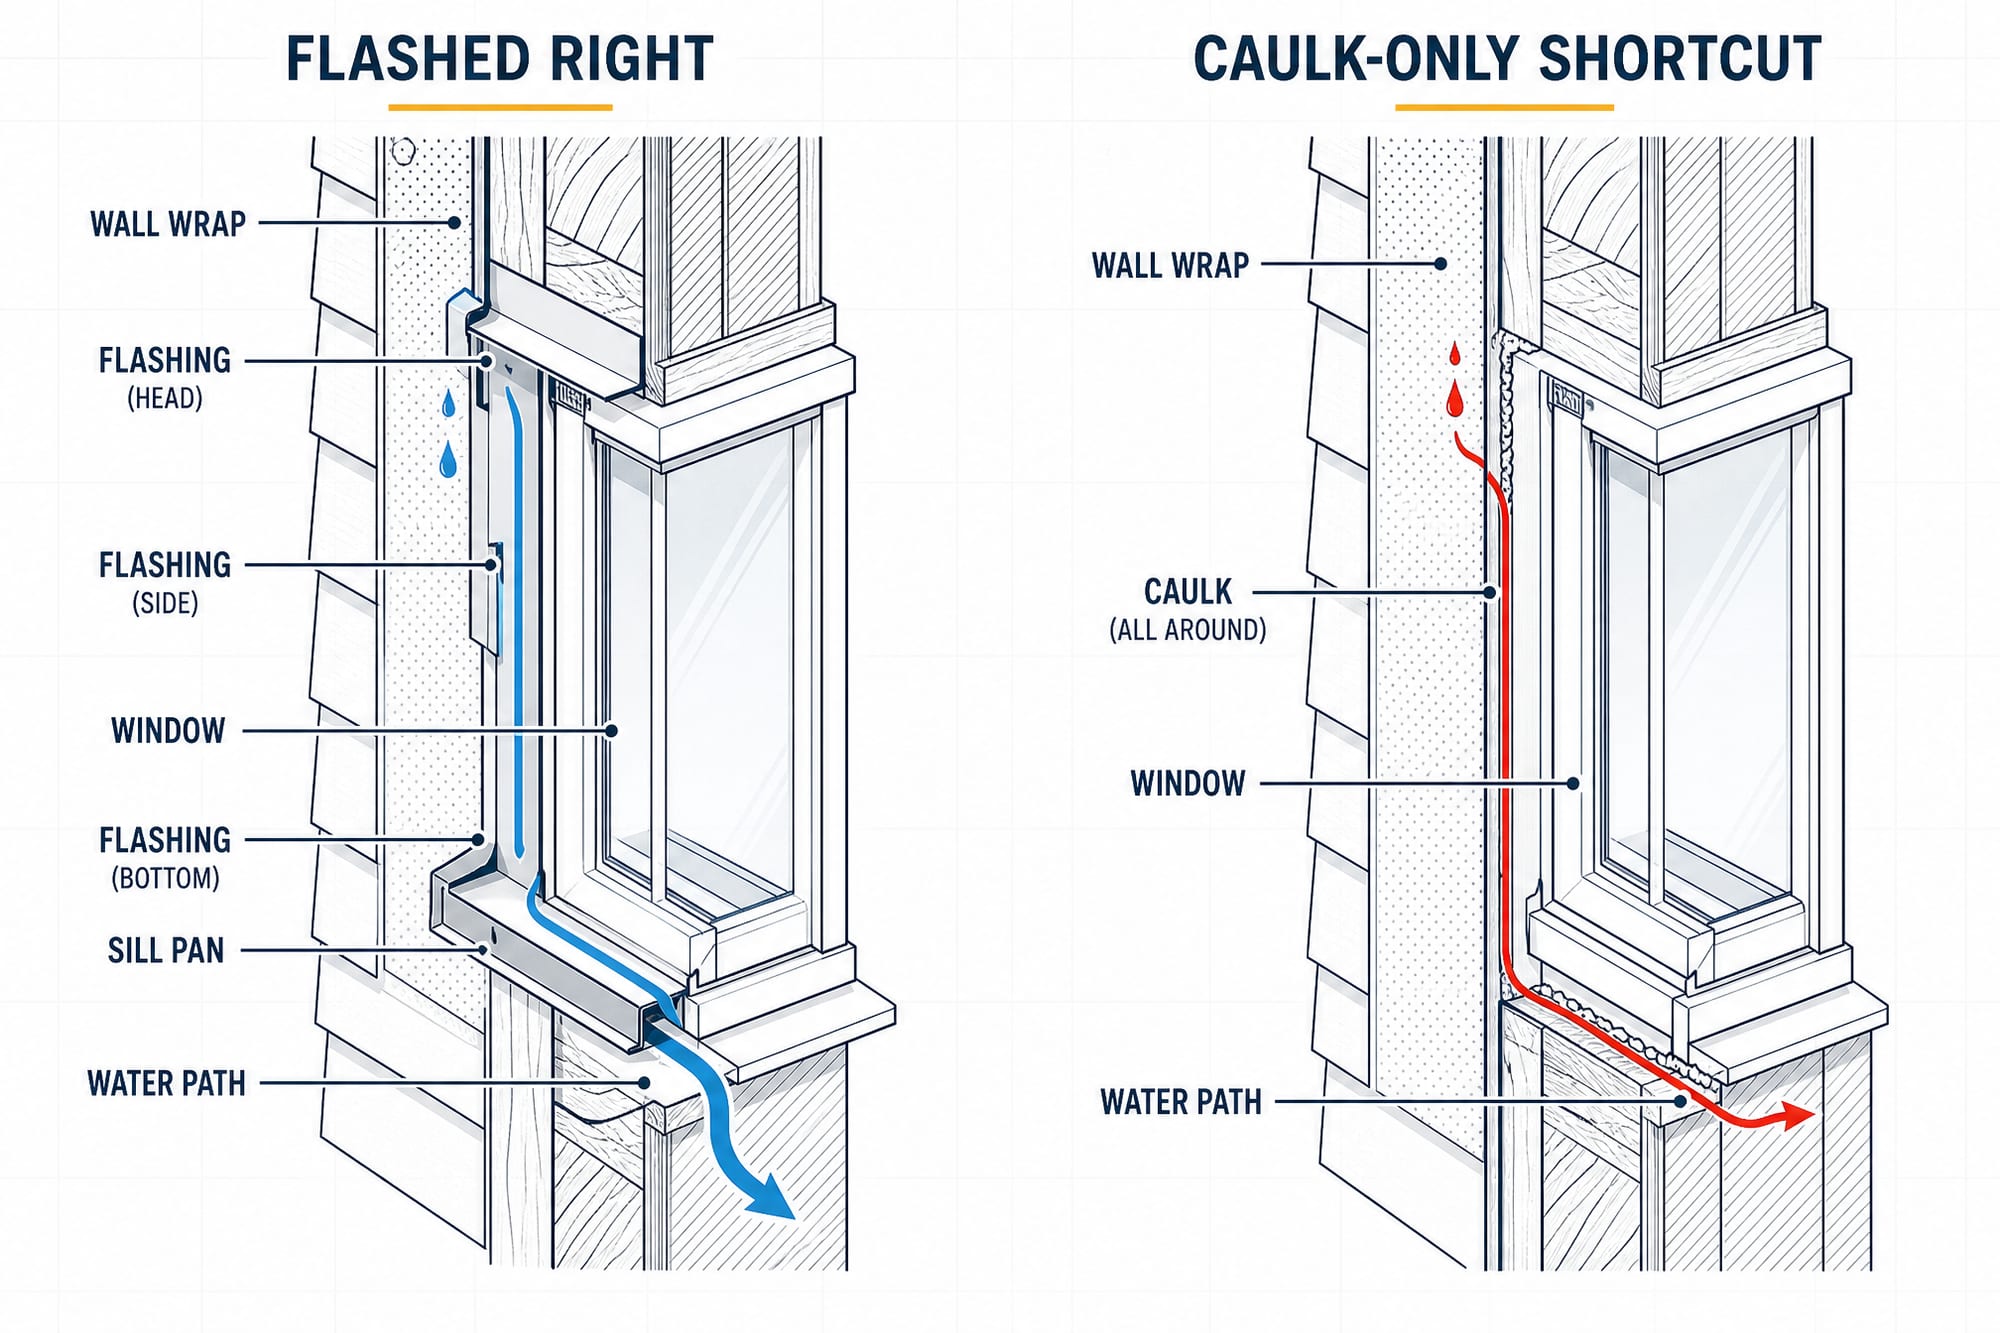
- Set up water management — the step that matters most. The window sits on a sill pan, a waterproof tray that catches any water that sneaks past and drains it back outside. Then the flashing goes on in shingle fashion — bottom first, then the sides, then the head — lapped so every layer sheds water down and out, integrated with the wall’s water-resistive barrier. Done right, water can never work its way in.
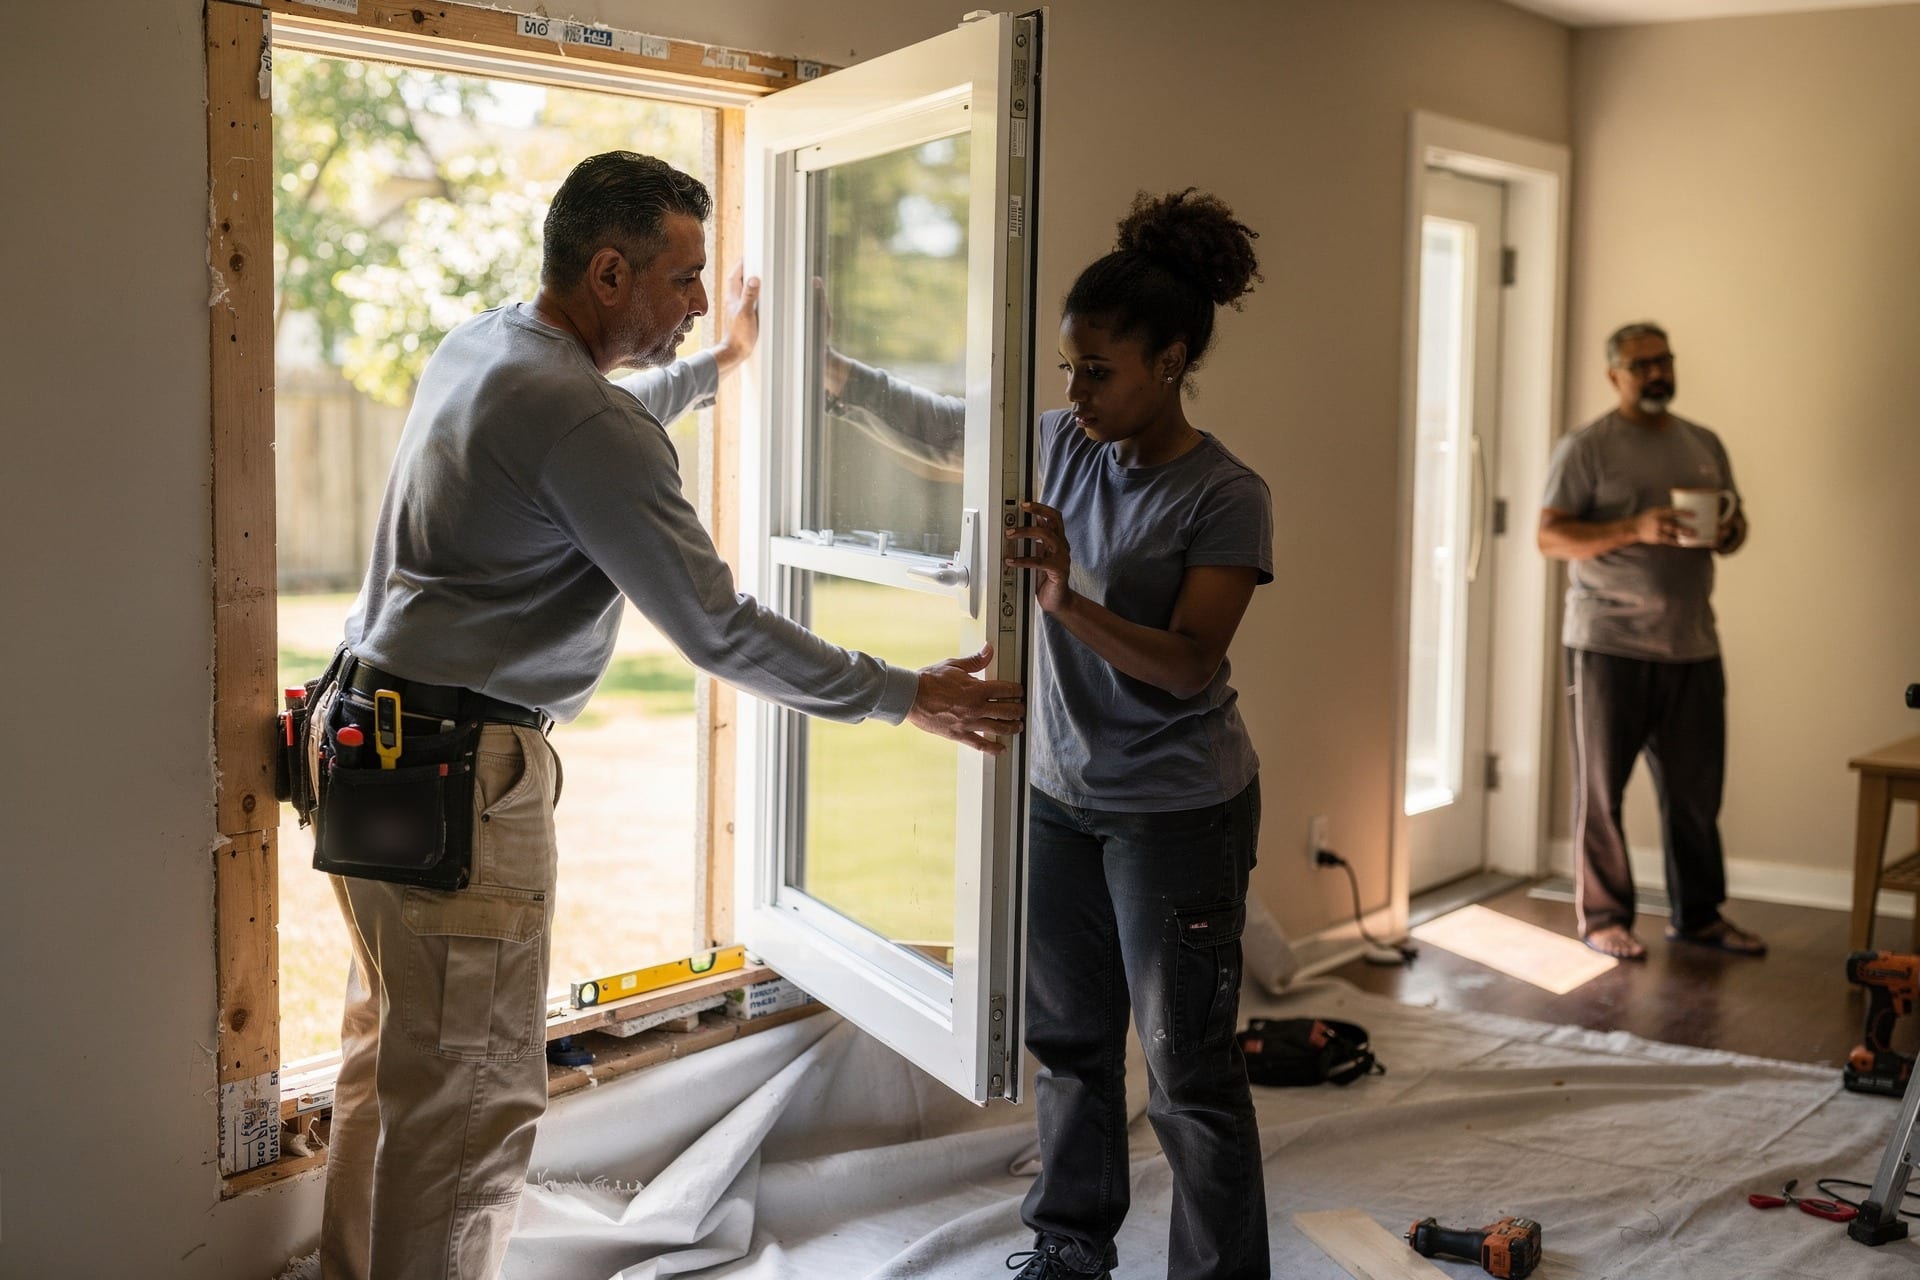
- Dry-fit and shim square. The unit goes in and gets shimmed — in pairs, at the sill and jambs — until it’s square, level, and plumb. The crew re-checks the diagonals. A window shimmed square opens, closes, and locks for decades; one shoved into a racked opening binds and wears out early.
- Insulate the gap. That intentional gap gets filled with low-expansion, window-and-door-rated foam (or fiberglass) — filled to roughly 40 to 50 percent, not stuffed. This is a real red-flag spot: high-expansion or over-packed foam bows the frame and the sashes stop working.
- Seal the perimeter. Where the gap is deeper, a backer rod sets the depth and a quality exterior sealant is tooled over it. The crew keeps the weep holes clear — those little slots at the bottom are the window’s drainage path, and caulking over them traps water inside.
- Trim it out. Interior and exterior trim finishes the job, with straight, even reveals inside and out.
Read that list once more and notice the theme: most of the day is about water and square, not glass. That’s the craft. The glass came from a factory; the performance is built right here, at the wall.
Good install vs rushed install — the difference you’ll live with
Same window, two very different outcomes — and the gap between them is entirely in the steps above. This is the comparison I most want you to have in your head while a crew is working, because a rushed install can look finished on day one and fail quietly by year two.
| Step | A good install | A rushed install |
|---|---|---|
| Water management | Sill pan + flashing lapped bottom, sides, head | Caulk-only — no pan, no real flashing |
| Setting the unit | Shimmed in pairs, square and level, diagonals re-checked | Shoved in and screwed off — sashes bind and stick |
| Insulating the gap | Low-expansion foam, filled part-way, frame stays true | Over-foamed and bowed, or left with open gaps |
| Sealing | Backer rod + tooled bead, weep holes kept clear | Caulk smeared over the weep holes, trapping water |
| Finish | Straight, even reveals inside and out | Crooked, gap-filled, over-caulked trim |
| What you feel later | Tight, quiet, operates smoothly for years | Drafts, leaks, stuck sashes, stains at the frame |
Water management
- A good install
- Sill pan + flashing lapped bottom, sides, head
- A rushed install
- Caulk-only — no pan, no real flashing
Setting the unit
- A good install
- Shimmed in pairs, square and level, diagonals re-checked
- A rushed install
- Shoved in and screwed off — sashes bind and stick
Insulating the gap
- A good install
- Low-expansion foam, filled part-way, frame stays true
- A rushed install
- Over-foamed and bowed, or left with open gaps
Sealing
- A good install
- Backer rod + tooled bead, weep holes kept clear
- A rushed install
- Caulk smeared over the weep holes, trapping water
Finish
- A good install
- Straight, even reveals inside and out
- A rushed install
- Crooked, gap-filled, over-caulked trim
What you feel later
- A good install
- Tight, quiet, operates smoothly for years
- A rushed install
- Drafts, leaks, stuck sashes, stains at the frame
The single biggest tell is the first row. If the plan is to run a bead of caulk around the outside and call it flashed, that’s not an install — that’s a leak on a delay.
Caulk seals a joint; it does not manage water. It’s a sealant with quiet ambitions of being flashing, and the weather has never once honored them. A sill pan and lapped flashing do that job — nothing else substitutes.
For the fuller catalog of what to watch — before, during, and after — the buying red flags page covers the sales-side tells, and the full NC installation picture covers the craft in depth.
After the crew leaves: inspect and register
Before anyone drives off, walk every window with them. This is your five-minute quality check, and it’s much easier to fix a problem now than to schedule a callback later.
Run this quick pass at each opening:
- Operate it. Open, close, and lock every sash. It should move smoothly and latch without a fight. Sticking or a lock that won’t catch usually means it’s not sitting square.
- Feel the perimeter. With the window shut, run your hand around the frame on a breezy day. A draft with the window closed means the air seal isn’t right.
- Look at the trim and the glass. Even reveals, no crooked or over-caulked lines. And no fog between the panes — that’s a failed seal, and it’s a warranty issue, not a wipe-it-off issue.
- Check the weep holes are clear at the bottom of the exterior — not sealed shut.
Then do the paperwork most people skip: register the warranty. Most manufacturer warranties require the window to be installed to their instructions, and some can be voided by a bad install — so keep your paperwork, register the product, and hang onto the installer’s info. A premium window only delivers its NFRC ratings if it was sealed and flashed right in the first place.
The short version — what to keep an eye on
You don’t need to supervise a crew. You need to know the four things that matter and glance at each one.
- Before: careful measuring and an honest insert-vs-full-frame call based on your frame’s real condition.
- During: water management first — sill pan and lapped flashing, not caulk — then shimmed square, foamed (not stuffed), weep holes clear.
- After: operate every sash, feel for drafts, check the trim and the glass, and register the warranty.
- The one red flag above all: a caulk-only “install” with no flashing or sill pan. That’s the shortcut that costs the most, latest.
A good install is not glamorous. It’s a sill pan, some patient shimming, the right foam, and a crew that keeps the weep holes clear. Get those right and your new windows do exactly what you paid for — quietly, for a long time.
If you want a second set of eyes before the crew arrives — what your quote should include, what to watch for on the day — that’s a no-pressure conversation, and you’ll come away knowing what a good install looks like for your openings. What the whole job should cost in NC is here too: replacement window costs.
Sources, Verification & Fact-Checking verified July 2026
Every load-bearing fact on this page is sourced and verified against a primary authority.
Verified July 2026 via direct review of the cited authority — the links open the controlling source so you can check it yourself rather than take our word.
- Proper install order — inspect the opening, set the unit on a sill pan, flash in shingle fashion (bottom, then sides, then head) integrated with the wall’s water-resistive barrier, shim square in pairs, insulate the gap with low-expansion window-and-door foam filled part-way (not stuffed), backer rod plus sealant where the gap is deep, keep the weep holes clear, then trim. Grounded in current building-science and manufacturer installation references; directional figures (“roughly 40 to 50 percent” foam fill) are hedged, and the exact foam product, shim, and fastener schedule vary by each manufacturer’s install spec.
- Measuring method — measure three widths and three heights and use the smallest each way; diagonals within about 1/4 inch means the opening is “square enough” for a standard replacement; the unit is ordered roughly 1/4 to 1/2 inch smaller than the opening to leave room to shim and insulate. Consistent with widely used installer measuring guidance (This Old House / Lowe’s / Home Depot); the diagonal tolerance is hedged “about a quarter inch.”
- Insert vs full-frame is decided by the existing frame’s condition — sound, square, and dry favors an insert; rot, racking, or leaks calls for full-frame. Deeper treatment on the full-frame-vs-insert page; no dollar figures restated here by design.
- Signs of a bad install — drafts with the window shut, visible gaps, an out-of-square unit (sashes stick), an over-foamed or bowed frame, a caulk-only install with no flashing or sill pan, water stains / bubbling paint / soft trim, and fog between the panes. The good-vs-rushed comparison is built directly from this list and corroborated across installer and building-science sources.
- A premium window only delivers its NFRC ratings if it is sealed and flashed correctly, and a bad install can void the manufacturer’s warranty (most warranties require installation per the maker’s instructions). The warranty-void point is stated as “can be,” hedged. (ENERGY STAR — windows, doors & skylights)
- Install duration — a day or two for a typical whole-house job, with insert (pocket) replacement generally faster than full-frame. Stated as a directional range only; it depends on window count and scope, and there is no verified per-window time figure. Grounded qualitatively against installer sources (July 2026) — don’t let a crew race the clock at the expense of the water-management steps.