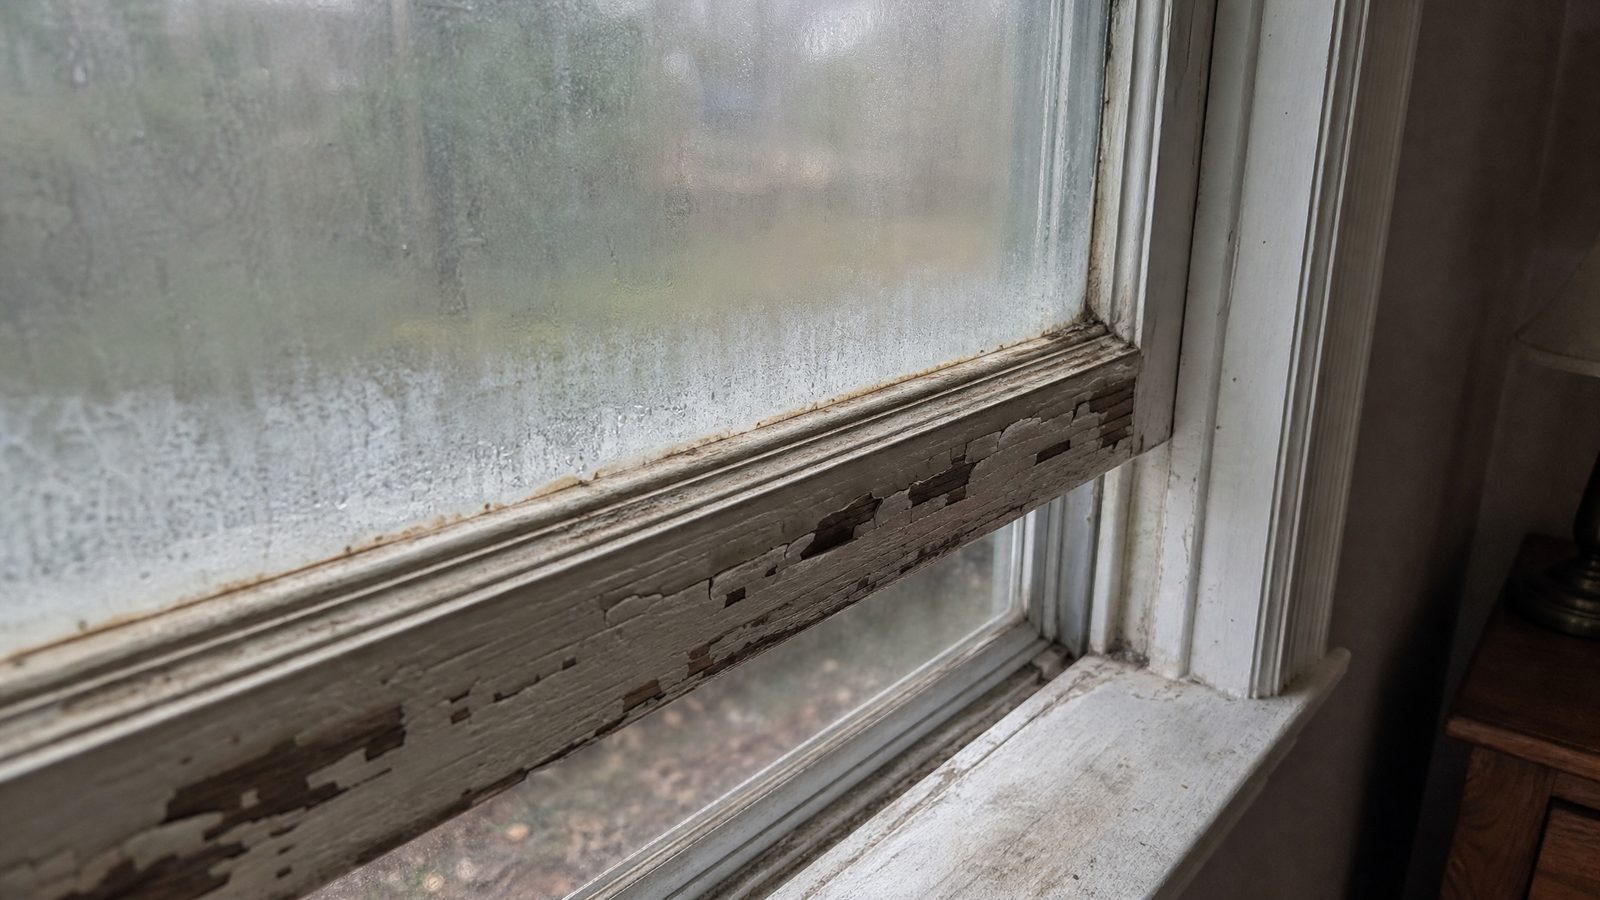


The part I watch hardest on any job is the flashing. The windows look fine on day one no matter who installs them.
It’s a year later that the truth shows up: a draft you can feel with the sash shut, a soft spot under the sill, a stain that wasn’t there before. That’s not the window failing. That’s the install failing, and by then the crew is long gone.
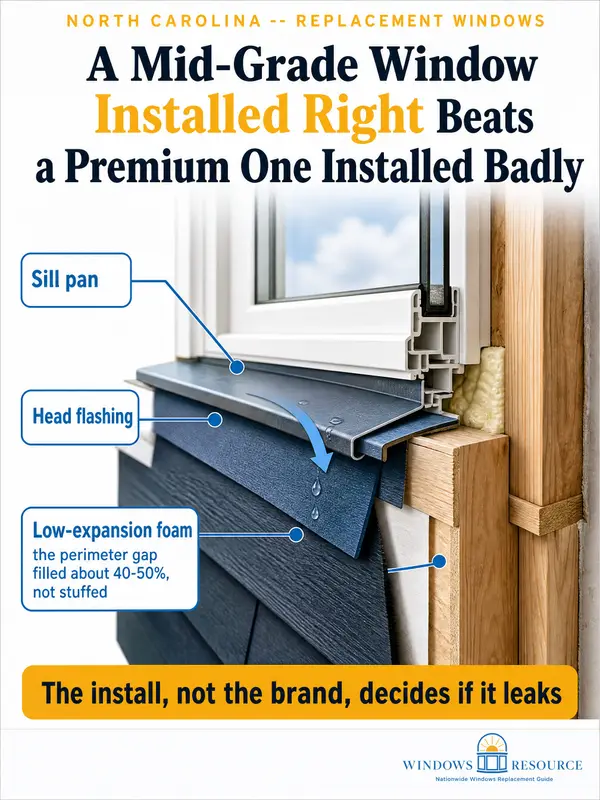
Here’s the thing North Carolina homeowners are rarely told straight: the single most important thing you’re buying isn’t the brand on the sticker. It’s the sill pan, the flashing, and the shimming you’ll never see once the trim goes on.
Get those right with a mid-grade window and you’ll beat a top-tier window installed badly every time.Why does the install matter more than the window brand?
A premium window only delivers its rated performance if it’s sealed and flashed right. Those ratings on the label assume the window meets the wall correctly. Gaps, a racked frame, or no flashing negate them.
It gets worse than lost performance. Most manufacturer warranties require the window be installed to their instructions.
A bad install can void that warranty entirely, so the leak isn’t covered and neither is the window. That’s why I tell people to judge the install, not the logo.
You’re right to suspect install matters more than brand. It does.
The install steps that actually matter (in order)
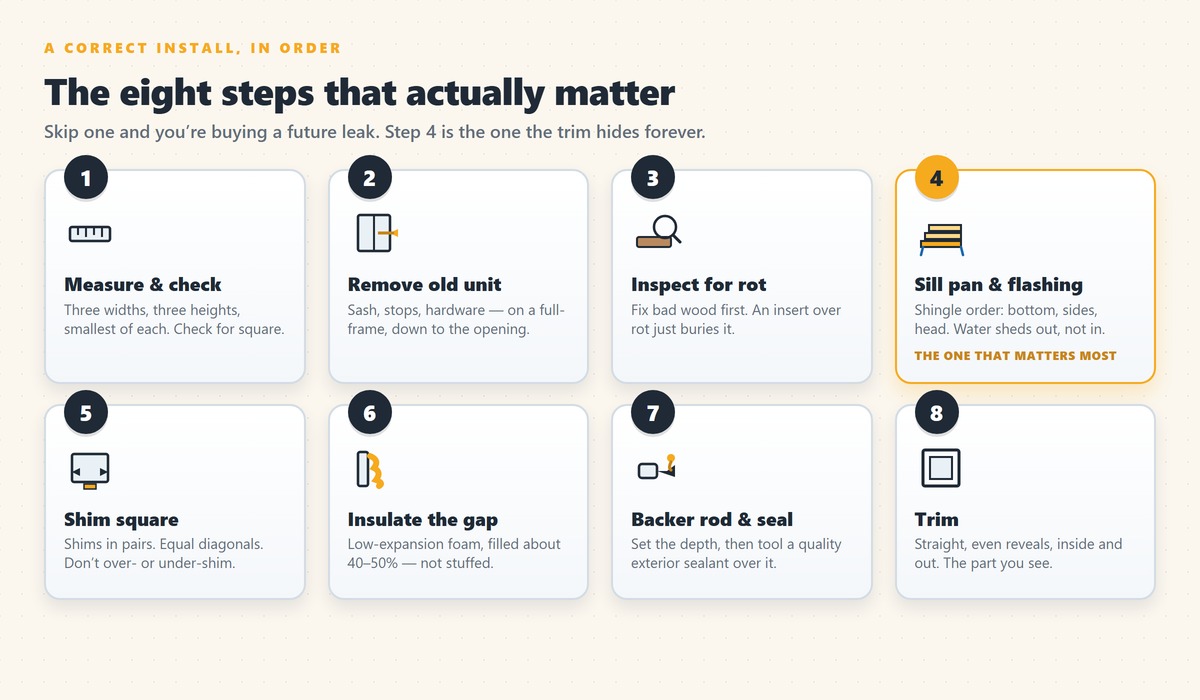
Here’s the sequence I want to see on any North Carolina job. Skip a step and you’re buying a future leak.
- Measure and check condition. Three widths, three heights, take the smallest of each. Check the diagonals for square. Then decide insert or full-frame based on the opening’s condition.
- Remove the old unit. Sash, stops, hardware, and on a full-frame, down to the rough opening.
- Inspect for rot. Pull the trim and look at the sill and framing. Fix the bad wood before anything new goes in. An insert over a rotted sill just buries the problem.
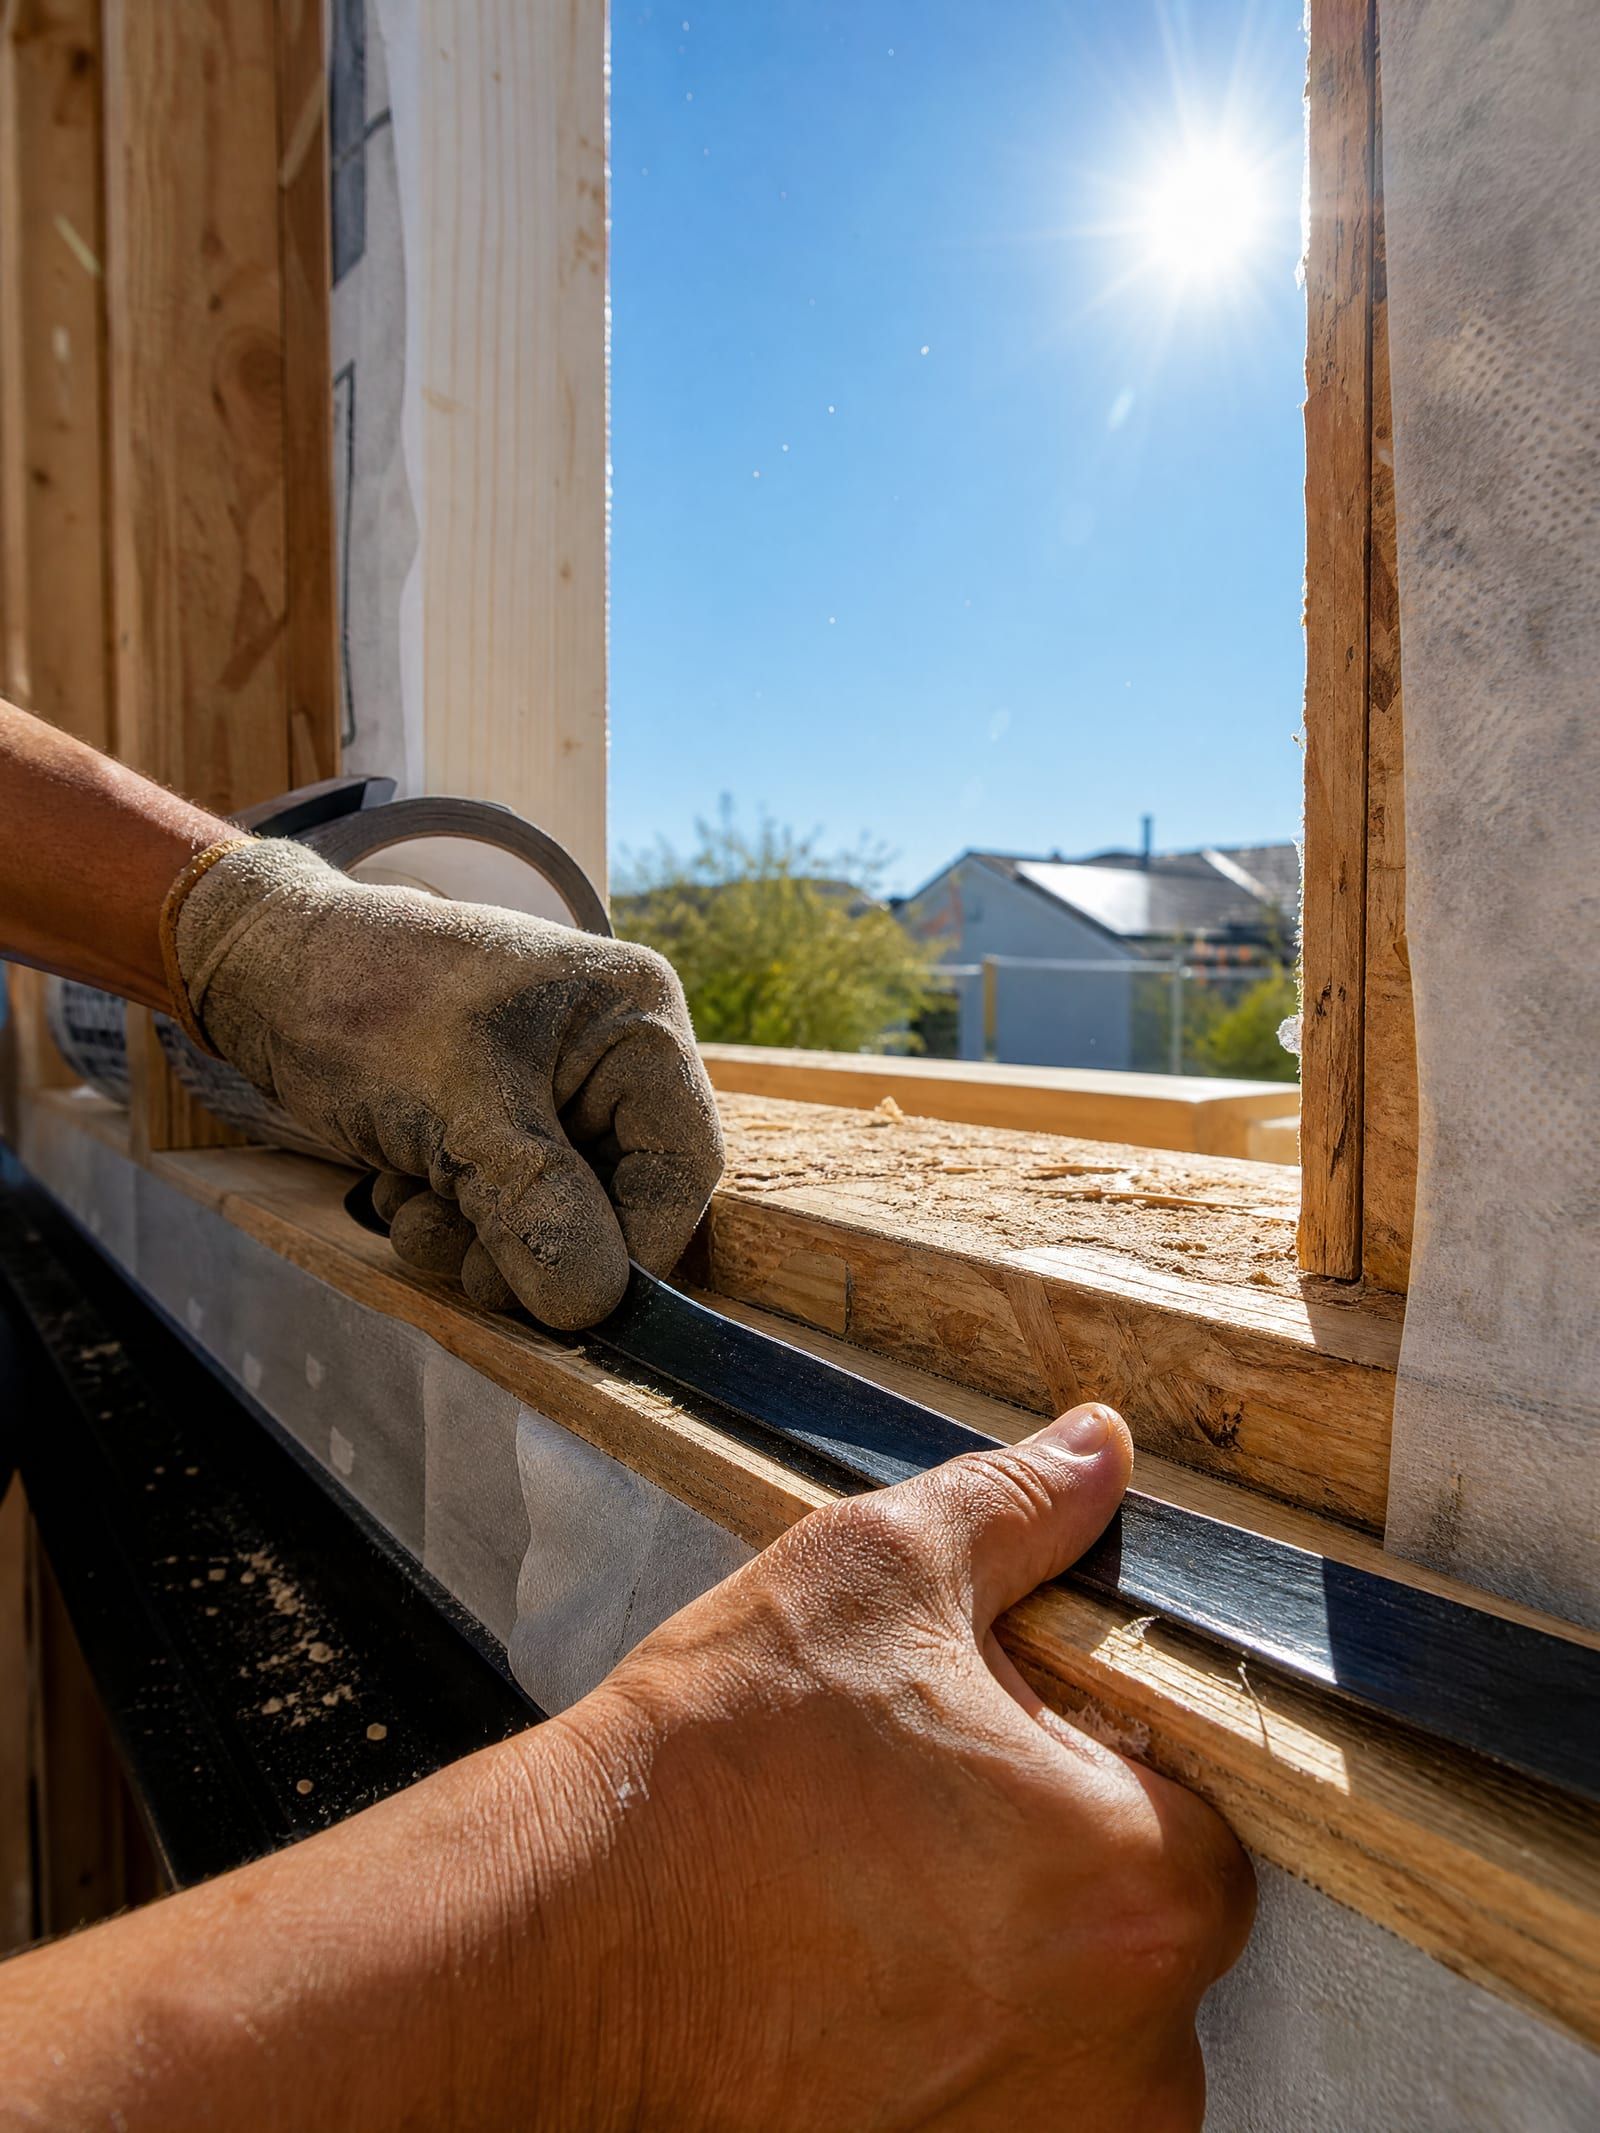
- Sill pan and flashing. Set the window on a sill pan that catches stray water and drains it out. Flash in shingle order — bottom, then sides, then head — integrated with the wall’s so water always sheds down and out.
- Shim square, level, plumb. Shims in pairs, inside and outside, at the sill and jambs. Check that the diagonals are equal. Don’t over-shim (bows the frame) or under-shim (no support).
- Insulate the gap. Low-expansion foam rated for windows and doors, filled about 40 to 50 percent — not stuffed. Over-filled or high-expansion foam bows the frame and the sash stops working.
- Backer rod and sealant. Where the perimeter gap is deep, closed-cell backer rod sets the depth, then a quality exterior sealant tooled over it. Keep the weep holes clear.
- Trim. Straight, even reveals, inside and out.
Insert vs full-frame: which install does your opening need?
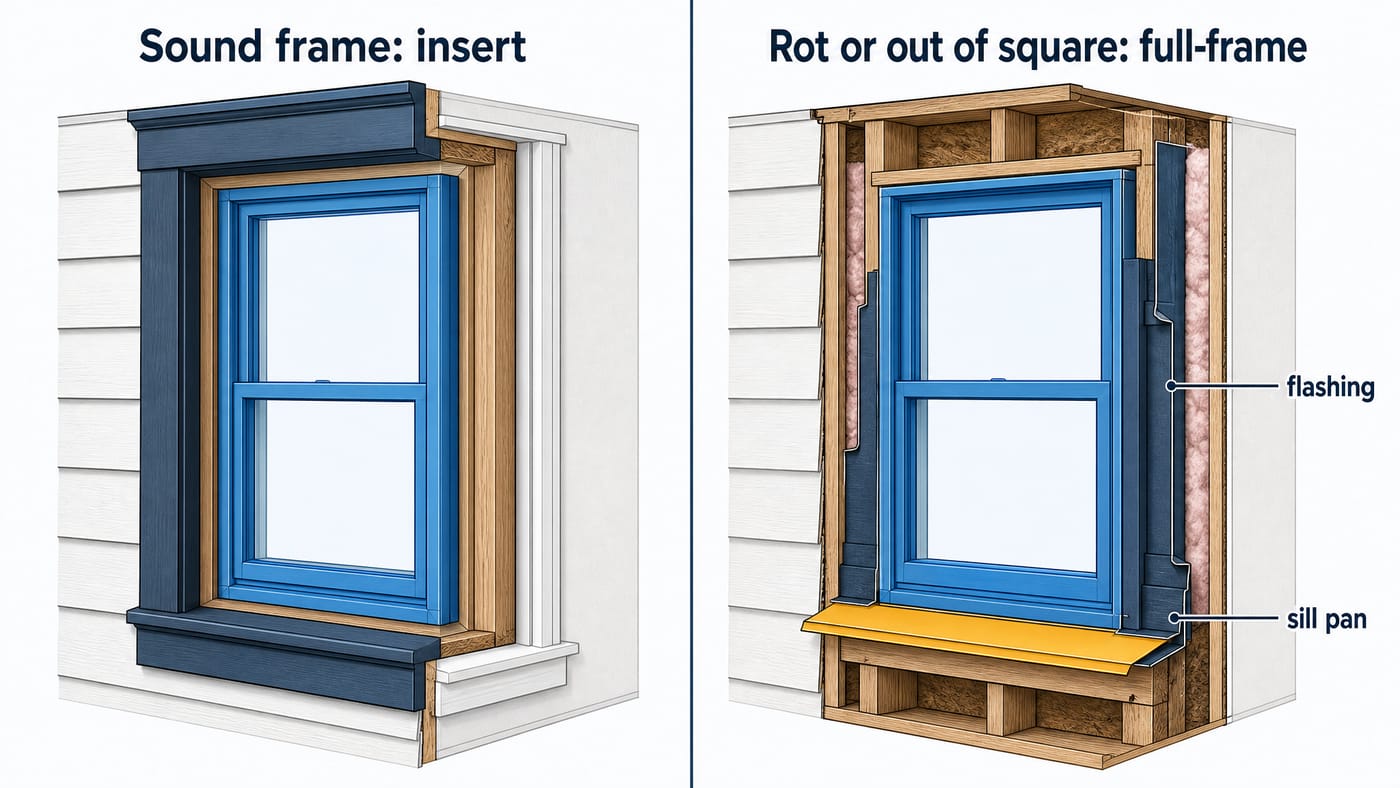
Sound, square, rot-free frame? An insert (pocket) replacement is fine. Rot or an out-of-square opening? You need full-frame.
An insert slides a new window into the existing frame and leaves your interior and exterior trim in place. It’s cheaper and less disruptive.
The catch: it slightly reduces glass area and won’t fix problems hiding in the old frame.
Full-frame replacement tears out to the rough opening so the opening can be inspected, flashed, and re-insulated.
What a BAD install looks like (the red flags)
If you see these after the crew leaves, the install was rushed or skipped steps. Walk the windows before final payment.
- Drafts with the window shut — poor air seal around the frame.
- Visible gaps at the sill, frame, or wall — bad measuring or no insulation.
- Sash won’t lock or sticks — the frame isn’t square.
- Over-foamed, bowed frame — high-expansion foam warped it. The sash binds.
- Caulk-only “install” — no flashing or sill pan, so water gets into the wall.
- Water stains, bubbling paint, soft trim — intrusion already happening.
- Fog between the panes — a failed seal or a defective unit.
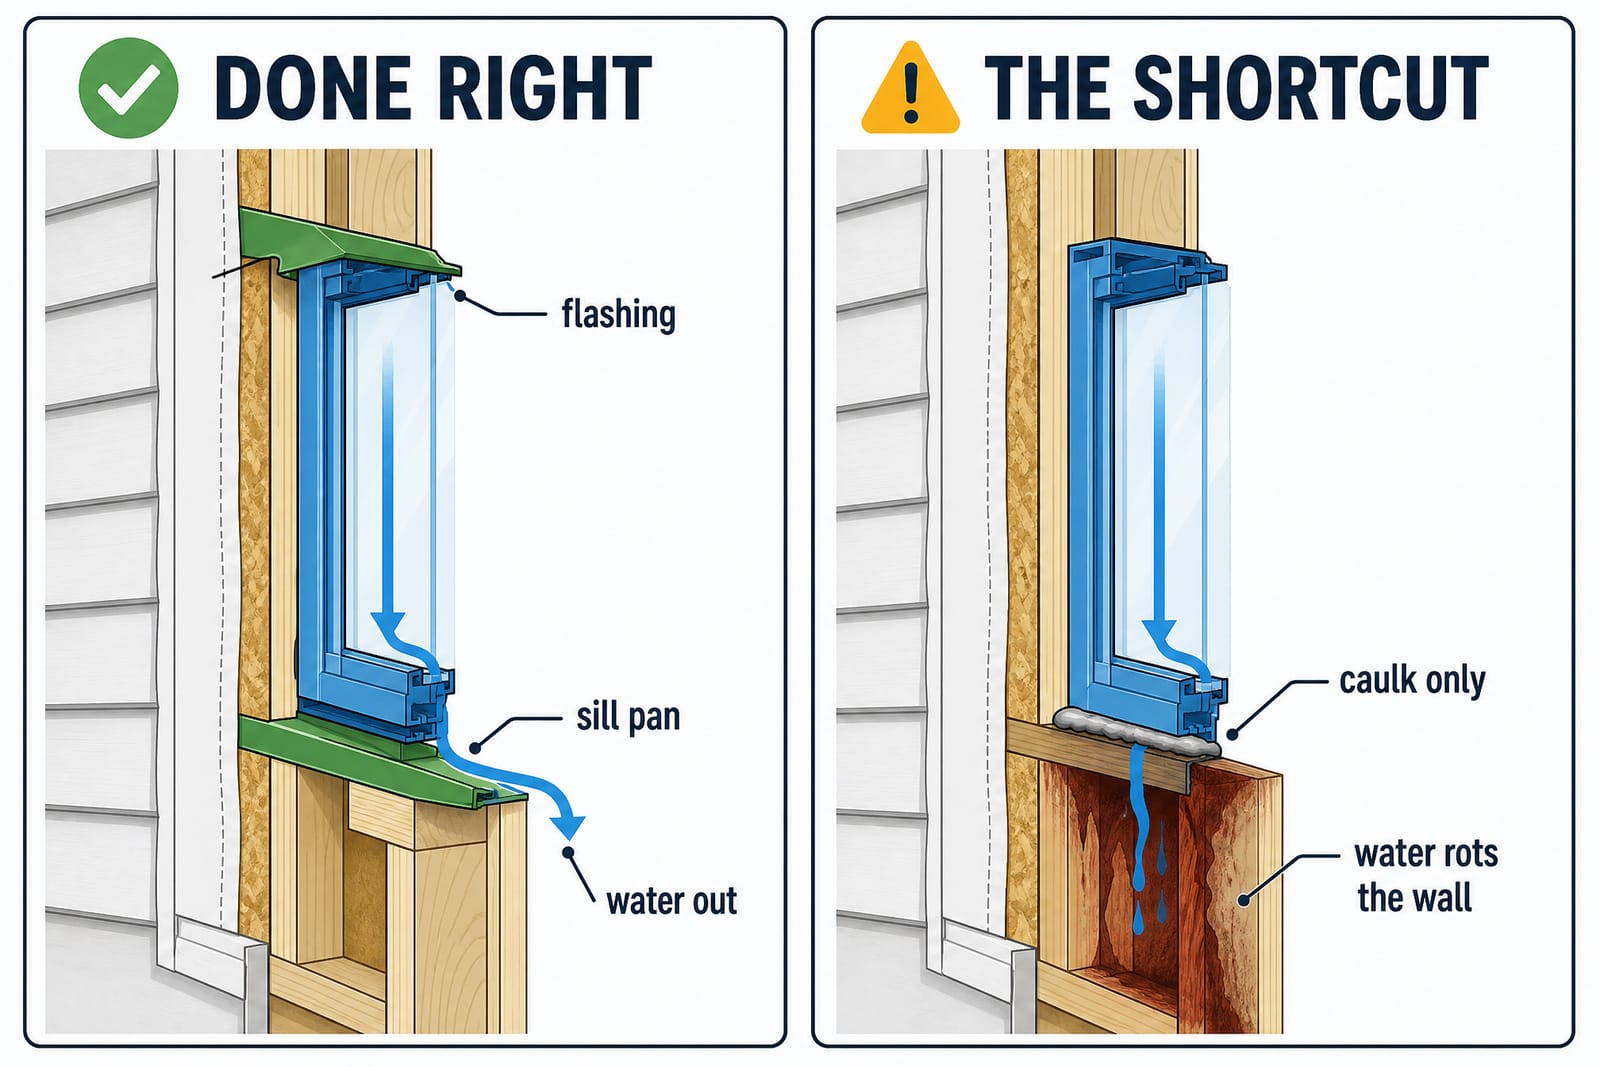
The caulk-only job is the one that scares me most. Caulk is not water management.
Without a sill pan and flashing, the first hard NC rain that gets past the window has nowhere to go but into your framing.
Walk every window and check for these before you sign off, and here’s how to spot a botched install in more detail.
Does the manufacturer or the contractor install — and why it matters
Find out whether the company’s own crew installs or whether it subs the work out. The labor warranty behind that crew is what stands between you and a leak a year later.
An own-crew installer carries its own workmanship warranty and answers for the result. A subbed crew can mean the install quality is whoever showed up that day, and a thinner labor warranty.
Ask who’s actually holding the drill, and read how a bad install voids the warranty before you compare brands.
Ask them, word for word: “Is this a full-frame or an insert install, what flashing and sill pan goes in, and how long is your labor warranty?” If the answer is vague on any of the three, keep asking until it isn’t.
What does installation cost in NC?
Labor is a real line item, and the cheapest install is usually a false economy. The window is only part of the price. The flashing, sill pan, shimming, and disposal are the rest.
Nationally, the labor portion of a window replacement typically runs about $100 to $300 per window for a straightforward retrofit (pocket) install, and roughly $150 to $800 per window for full-frame work or large bay/bow units that need two installers — labor is usually somewhere around a third of the total job.
Those are national ranges from the major cost guides, not an NC quote for your home. The number moves with your opening type, full-frame vs insert, region, and how much rot the crew finds once the trim comes off.
What you don’t want to do is shop on labor price alone: the flashing, sill pan, and labor warranty are exactly what the lowball install leaves out.
A bargain install that skips flashing isn’t a deal. You can see what windows actually cost in NC and exactly what moves the number.
Do you need a permit to replace windows in NC?
It depends on whether you’re swapping like-for-like or resizing the opening. And “no permit if you pay cash” is a tell, not a favor.
Here’s the short version. A like-for-like swap — a new window into the same opening, same size — usually needs no building permit in North Carolina. The state statute (NCGS 160D-1110) explicitly exempts replacement of windows, doors, and siding from the permit requirement.
You do need a permit the moment the job stops being a straight swap:
- Resizing or cutting a new opening — that’s header and framing work.
- Adding or creating an egress window.
- A project that tops the statute’s $40,000 cost threshold.
- A local overlay like a historic district.
When a permit is required, the contractor pulls it — that’s part of what you’re paying a licensed installer for, and a reputable one won’t ask you to dodge it.
On the NC coast, there’s an added wrinkle that isn’t about permits at all: in the wind-borne-debris region, exterior glazing must be impact-protected and the units must be fastened per the impact-rated installation instructions, so coastal openings carry a fastening and product standard inland jobs don’t.
Here’s whether you need a permit to replace windows in NC.
The install is the part I watch on every job, because it’s the part that decides whether your windows hold up.
If you want a second set of eyes, book a no-pressure consult and I’ll walk you through how yours gets done — sill pan, flashing order, the whole sequence — before anyone touches your wall. A year later, the only thing that should show up is nothing.
Sources, Verification & Fact-Checking verified July 2026
Every load-bearing fact on this page is sourced and verified against a primary authority.
Verified July 2026 via direct review of the cited authority — the links open the controlling source so you can check it yourself rather than take our word.
- NFRC energy ratings describe the window as tested — they assume it’s installed correctly. The National Fenestration Rating Council determines U-factor, SHGC, and VT by lab simulation and physical testing of the product unit; the ratings do not account for how the product is installed, and a window won’t perform as rated if it isn’t installed well. Gaps, a racked frame, or missing flashing let air and water bypass what the number measures. (view source — NFRC)
- Proper installation is what lets a window deliver its rated efficiency. The U.S. Department of Energy puts it plainly: “windows are only as good as their installation” — proper installation (flashing, air sealing the rough opening, and following the manufacturer’s instructions, per ASTM E2112) is what protects against water damage, limits air leakage, and prevents condensation; departing from the manufacturer’s instructions can also void the warranty. (view source — DOE Building Science, Correct Window Installation Methods)
- Most manufacturer warranties require installation per the manufacturer’s written instructions, and an install that departs from them can limit or void coverage. Terms vary by brand — Pella, for example, publishes warranty terms under which failure to follow its installation and maintenance instructions can limit or void coverage. Read the specific warranty document before you buy. (view source — Pella warranty terms)
- Correct water management runs the sill pan and flashing in shingle order (bottom, then sides, then head), integrated with the wall’s water-resistive barrier so water always sheds down and out. DOE’s Building Science guidance calls for pan/sill flashing first, then side (jamb) flashing lapping over the pan, then head flashing lapping over the sides — each layer shingle-lapped and tied into the drainage plane so water is directed out of, not into, the wall. (view source — DOE Building Science)
- Whether a window replacement needs a permit in NC depends on the scope of work and the local jurisdiction. Under NCGS 160D-1110, subsection (c)(1) exempts the replacement of windows, doors, and siding from the permit requirement when done to the NC State Building Code — so a like-for-like swap in the same opening usually needs no permit. A permit is required when the opening is resized or newly cut, an egress opening is created, the project tops the statute’s $40,000 threshold, or a local overlay (e.g., a historic district) applies. Permits are administered locally by each city/county inspections department. (view source — NCGS 160D-1110, ncleg.gov)
- On the NC coast, exterior glazing in the wind-borne-debris region must be impact-protected and installed (fastened) to the impact-rated instructions — a code requirement separate from any permit. The region covers a basic design wind speed of 140 mph or greater, or 130–140 mph within one mile of the coastal mean high-water line, with protected glazing passing the Large Missile Test of ASTM E1886/E1996; exact contours are address-specific. (view source — 2018 NC Residential Code R301.2.1.2, ICC Digital Codes)
- Window-replacement labor is a national market figure that varies by opening type, full-frame vs insert, and region — no single NC “average” is meaningful. National cost guides put the labor portion at roughly $100–$300 per window for retrofit/pocket installs and about $150–$800 per window for full-frame or large bay/bow units, with labor commonly around a third of the total job. Presented as national ranges, not an NC quote. (view source — HomeAdvisor window installation cost guide; Fixr window replacement cost guide)